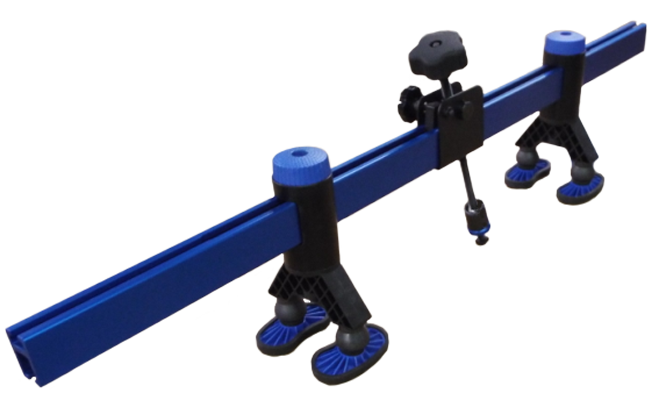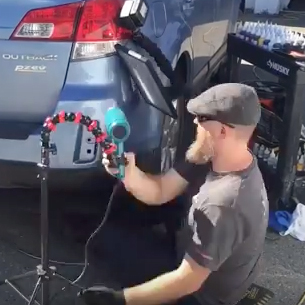
Here is a post for my fellow PDR technicians out there (Customers: please don’t try and glue pull your own vehicle as irreversible damage can occur). So Clint and I were cruising around Home Depot and he pulled this idea out of his butt, er brain, as we stood there in the hardware aisle. Below you’ll find a list of all that you will need to create the same glue bridge that we did with mostly inexpensive parts from the hardware store. This list is certainly not the only way to skin this cat, so please feel free to use it as inspiration to create your own version if you like:
- Punched Square Tube 1×36″ (Cut in half, sand edges) – $13.98 (Home Depot)
- Pine Pinth Blocks 2.5×5″ (Feet) 2@2.18 – $4.36 (Home Depot)
- 5/16″ Threaded rod (12″ length for legs) 2@1.17 – $2.34 (Home Depot)
- 1/4″ Threaded rod (12″ long for pull shaft) – $.98 (Home Depot)
- Mini Lifter Pass Thru Head (this one his threaded for 1/4″) – $20 (Ultra)
- Foam Sanding Blocks (feet pads) 2@7.87 – $15.74 (EBay)
- Flat Head Cap Screws 5/16″x 1.25″ (Feet hinge screws) 2@$1.34 – $2.68 (Home Depot)
- Aluminum Spacers (For Feet) 6@0.80 – $4.80 (Home Depot)
- #8 x 3/4 in. Flat-Head Wood Screws (12-Pack) $1.18 (Home Depot)
- Fender Washers ASD 1/2″ hole 1.5″ (mount to feet w/spacer) 2@0.38 – $0.76 (Home Depot)
- Cut Washers ABB 5/16″ (For Legs) 5@0.13 – $0.65 (Home Depot)
- Coupling Nuts 5/16″ (7/8″ length) 4@1.30 – $5.20 (Home Depot)
- Couple Nut 1/4″ (1 3/4″ length for top of pull shaft) $1.89 (Ace)
- Wing nuts 5/16″ (top of legs) 2@0.37 – $0.74 (Ace)
- Tools/Supplies: Spray adhesive, Drill, Cutting tools: saw/grinder, sandpaper, 2 pennies, a little lube
Cost: $75 to $100
You could make this cheaper or more expensive by doing things a bit different from how we did it. No biggie. As long as it works, who cares? But please comment on this post for any questions or for any alterations you made on yours. Love to see some photos, too.
[us_image_slider ids=”6520,6523,6525,6527,6530,6531,6532,6533,6537,6538″ arrows=”hover” nav=”thumbs” autoplay=”1″ fullscreen=”1″ autoplay_period=”3″ img_size=”us_800_0″][us_separator size=”large”][vc_row_inner][vc_column_inner width=”1/2″]
Brief description of how to put this thing together: One of the only really complicated parts of this project was cutting the square tube (which I had a friend do for me). I think 18 inch length on this bridge is perfect and you can make 2 bridges with one 36 inch tube. Sand those sharp edges off once its cut.
The genius of this design is the swivel feet that are made with a washer, spacers, a penny, and a tapered head (Flat Head) screw. I’ve seen other bridges with ball and joint type swivel hardware. We had no idea where to find anything like that so this work around works great.
So the 2 large washers need three holes drilled in them to be able to mount them to the spacers with wood screws. We made sure these were close enough together that we could fit a penny under the washer without it falling out. I used a 5/32″ metal bit and it worked great. The thought process with having a penny for the flat part of the screw to roll on, was to provide a solid surface for that screw head to push on. It seems to be working great but please let us know your thoughts on it.
The pass thru lifter head we bought from Ultra is threaded for 1/4″ and at first we thought to die and tap it to 5/16″ to keep the threaded rod all the same. But I just grabbed a 1/4 inch threaded rod and it seems to work just fine. You can find other lifter heads out there that may work better for your particular glue tabs. I know that Dent Craft and A1 Tools have them as well.
The feet need padded somehow and a friend suggested I use Soft Block flexible sanding block from Motor Guard. At first I had spray glued a mouse pad on the pine blocks and trimmed it to the edges. It just seemed like it wasn’t cushiony enough for my tastes. The sanding pads add another $16 to the total cost but I think its worth it. Spray your glue, set the pine blocks on, and let sit over night with a little bit of weight on them.
[us_image_slider ids=”6540,6541,6542,6543,6544,6513″ arrows=”hover” nav=”thumbs” autoplay=”1″ fullscreen=”1″ autoplay_period=”3″ img_size=”us_800_0″][us_separator size=”large”][vc_row_inner][vc_column_inner width=”1/2″]
You need to cut your threaded stock for the legs and the lifter piece. I just used a small hand saw and them sanded the sharp edges down with my Dremel. I cut mine to 5 1/4″ but you can cut them to whatever length you’d like. All you have to do now is thread everything together. Sometimes that stock can have crud in the thread or a rough spot. Use a crescent wrench and some dry lube if it gets hung up.
Boom. There you have it. Cruise over to my Instagram to see it in action… and please comment with some photos of your own builds. I would like to thank the creator and inventor of the glue bridge, I believe it was Ding King, so many years ago. It’s a great tool that has helped our industry grow.
[us_message color=”custom” closing=”0″ css=”%7B%22default%22%3A%7B%22color%22%3A%22%23efebe5%22%2C%22background-color%22%3A%22%23ff9000%22%7D%7D”]Also note that there are a few companies that make much nicer versions of this bridge that you can buy if you’d like higher quality and more functionality. The wise old adage, “You get what you pay for” really rings true most times. This DIY tutorial is really just meant to get guys (like me) started using this type of PDR tool. One such company that is leading the industry in glue pulling technology is KECO Tabs. I highly recommend their tabs and lifter and one day I will eventually get one or more of their advanced designed glue pulling systems. Until then I am content cutting my teeth with this inexpensive hardware store hack. But after watching this video I want to buy every tool KECO makes.[/us_message]


